DIY Beehive: How to Make Your Own Hive Equipment and Save Money
Beekeeping is an enjoyable and rewarding hobby that has gained massive popularity in recent years. It helps to improve the ecosystem and ensures that our environment is still productive. It is also a great way to produce healthy honey and beeswax.
However, one of the significant challenges new beekeepers face is the cost involved in purchasing hive equipment. But, did you know that you can make your own hive equipment?
In this article, we will show you how to make your own hive equipment and save money.
Importance of Beekeeping
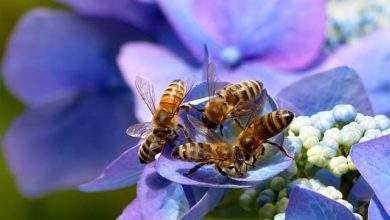
Beekeeping is not only a rewarding hobby, but it is also crucial for the environment. Bees play a vital role in pollinating crops, which makes them an important part of the food chain. Honeybees alone are responsible for pollinating approximately 80% of flowering plants, which includes many fruits and vegetables that we rely on for food. In addition to their role in pollination, bees also produce honey and beeswax, which have a multitude of uses.
The Cost of Beekeeping
Like any hobby, beekeeping can be expensive. The costs of purchasing bees, hive equipment, and other necessary supplies can quickly add up. In addition, it is important to regularly maintain the hive to ensure that the bees remain healthy and productive. This requires additional costs such as buying medication for the bees and replacing damaged equipment.
The Benefits of Making Hive Equipment Yourself
Making your own hive equipment offers several benefits. First and foremost, it is a great way to save money. By making your own equipment, you can reduce the cost of beekeeping significantly.
Additionally, it allows for customization of the equipment to meet your specific needs. For instance, you can build the hive to fit your available space or add specialized features to improve hive productivity.
Lastly, by making your own equipment, you can learn valuable skills that can be applied to other areas of your life.
The Basic Equipment Required for Beekeeping
If you’re thinking about becoming a beekeeper, there are several pieces of equipment that you will need to get started. Here, we’ll cover the some essential items that every beekeeper should have before they begin.
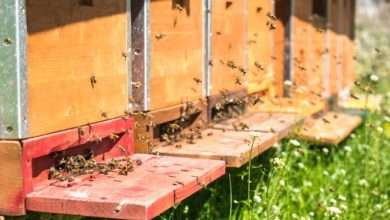
- The Beehive
The beehive is the central structure where your bees will live and produce honey. There are many different types of beehive designs, but the most common is the Langstroth hive. This type of hive is stackable and consists of boxes that can hold frames where the bees will build their honeycomb.
The two main types of boxes include the Brood Box and Honey Supers.
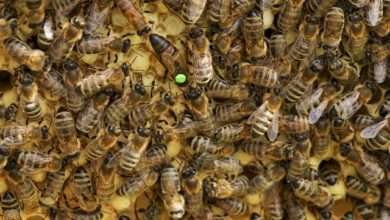
Brood Box
The brood box is the main housing unit for the worker bees and queen bee in the hive. This is where they will build comb, store pollen, and rear brood (developing bees). The brood box typically measures around 16 x 10 inches and provides plenty of space for the bees to live and work. Beekeepers can purchase pre-made brood boxes or build their own.
When it comes to materials, the brood box can be made from either wood or plastic. Most beekeepers prefer to use wood as it is a more traditional option that has been used for centuries. Many beekeeping stores sell pre-made wooden brood boxes, or beekeepers can purchase wood and build their own. The most popular type of wood for beekeeping is pine as it is readily available, affordable, and durable.
Honey Supers
Honey supers are boxes that are placed on top of the brood box once the colony has established itself and is growing. This is where the bees will store surplus honey that can be harvested by the beekeeper. Honey supers are not usually placed on the hive until the spring when the bees begin to collect and store nectar.
Like the brood box, honey supers can be made of wood or plastic. The most common size for honey supers is 6 5/8 inches. However, some beekeepers use 5 3/4 or 4 3/4-inch supers. This is because smaller supers are lighter and easier for the bees to fill.
- The Frames
Frames are what hold the honeycomb inside of the hive. These frames are usually made of wood and have a plastic or wax foundation where the bees will build their comb. The frames are placed inside of the hive boxes, and several frames can be stacked on top of each other to make a taller hive.
- The Foundation
The foundation is what the bees will use to build their honeycomb. There are two types of foundation: plastic or wax. Plastic foundation is more durable and easier to use, but some beekeepers prefer wax foundation because it is more natural and has a stronger scent that attracts bees.

- The Cover
The cover is what protects the bees from the elements, such as rain and snow. The cover can be as simple as a wooden board or as complex as a metal roof. Some beekeepers prefer a telescoping cover, which is made of two wooden pieces that overlap to protect the hive from moisture.
- The Bottom Board
The bottom board is the floor of the beehive. This is where the bees will enter and exit the hive. There are two types of bottom boards: solid and screened. A solid bottom board is more traditional and keeps the bees warmer in colder climates. A screened bottom board allows for more ventilation and is better for warmer climates.
How to Make Your Own Beehive
Here are step-by-step instructions on how to make your own beehive:
A. Choosing the Right Type of Wood
Before constructing a beehive, it is essential to choose the right type of wood. The best types of wood for a beehive are pine, cedar, and cypress. These woods are durable, weather-resistant, and have low toxicity levels. Avoid using treated wood, as it has harmful chemicals that may harm the bees.
B. Constructing the Basic Box
Once you have the right type of wood, the next step is to construct the basic box, also known as the brood box. It is the bottom part of the hive and is where the queen bee lays her eggs. To make the box, you will need the following materials:
- Four wooden boards of the same size (16 inches by 20 inches)
- Nails
- Hammer
To assemble the box, follow these steps:
1. Stand two of the wooden boards on their edges to form a corner.
2. Nail another board to the edge of the first board until all four boards are nailed together to form a rectangular box.
3. Repeat these steps to make a second box for the top of the beehive.
C. Adding the Frames
After constructing the basic box, the next step is to add frames. Frames hold the combs where the bees store honey and raise their young. To make a frame, you will need the following materials:
- Four pieces of wood (1 inch by 1 inch)
- Wire
- Eyelets
- Hammer
Follow these steps to make a wooden frame:
1. Cut the wooden pieces to the desired size and shape.
2. Nail the four pieces together to make a square or rectangular frame.
3. Drill small holes in the upper part of the frame and insert the eyelets.
4. Cut a piece of wire slightly longer than the width of the frame.
5. Loop the wire through the eyelets and twist the ends together using pliers.
Installing the Foundation
A foundation provides a base for the bees to build their combs. You can use a pre-made wax foundation or make your own using beeswax.
To install a foundation, follow these steps:
1. Place the wooden frame on a flat surface.
2. Apply a thin layer of beeswax over the entire surface of the frame, ensuring that it is even.
3. Insert the foundation into the frame, and press it firmly against the wax.
Adding the Cover
Adding a cover to protect the hive from rain and direct sunlight is crucial. A cover should be made of a flat piece of wood with a sloping top. To make a cover, you will need the following materials:
- Plywood (20 inches by 24 inches)
- Roofing material
- Nails
- Hammer
Follow these steps to make a cover:
1. Cut the plywood to the desired size and shape.
2. Nail roofing material to the underside of the plywood.
3. Attach the cover to the beehive using nails.
The Bottom Board
You may choose to either make a solid or screened bottom board. The screened bottom board requires more materials.
Here is how to make the bottom board:
Materials needed:
- Plywood
- Screen mesh or # 8 hardware cloth
- Wood glue
- Screws
- Saw
- Tape measure
- Drill
- Router
Step 1: Design Your Bottom Board
The first step to creating a beehive bottom board is choosing the right design. A solid bottom board does not have any openings while a screened bottom board has a mesh screen that covers the bottom.
The screened bottom board allows for better ventilation and better mite control as the mites fall down through the screen. You can also choose to add a sliding board under which drawers can be placed. The sliding board can be removed to monitor the mite counts.
Step 2: Measurements
Measure the dimensions of your beehive and cut a piece of plywood that is the same size. Cut another piece of plywood in the exact same size as your first piece.
Step 3: Router The Edges
Using a router, round the edges of the two boards. This will make it easier to handle the bottom board and protect the bees from any sharp edges.
Step 4: Screw The Boards Together
Using screws, attach the two boards together, making sure to glue the two pieces of wood together first. This will create a solid wood bottom board for your beehive.
Step 5: Make an Entrance
Cut out an entrance in the center of the board. You can use a wooden blocking or hardware cloth or a combination of both to control the size of your entrance.
Step 6: Screened Bottom Board
If you have decided on a screened bottom board, cut a piece of screen mesh or hardware cloth slightly larger than the size of the bottom board. Use a staple gun or screws to attach the screen to the underside of your bottom board.
Step 7: The Drawer

If you choose to add a sliding board, screw or glue wooden cleats onto the bottom of the hive, add a cutout into the wood approximately 9 x 20 inches in the center, and add a board frame to hold a mite tray in place.
Conclusion
Making your own hive equipment is a great way to save money while still enjoying the benefits of beekeeping. With a bit of research and planning, you can create high-quality hive equipment that will help your bees thrive.
Additionally, it is a great way to learn new skills and improve your DIY abilities. So get out there, and start building!
FAQ
What is the cost savings of DIY beekeeping?
- The cost savings of DIY beekeeping can vary, but on average, it can save beekeepers up to 50% of the cost of purchasing premade beekeeping equipment.
Do I need experience in carpentry to do this?
- No, you don’t need to have carpentry experience to do DIY beekeeping. There are many tutorials and guides available online that can help you get started.
What equipment do I need to get started?
- The equipment required for DIY beekeeping includes a saw, a hammer, nails, and a few other tools. You can purchase raw materials such as wood, mesh screens and frames from your local hardware store.
Is DIY beekeeping suitable for beginners?
- Yes, DIY beekeeping is suitable for beginners. As long as you follow the right instructions and use suitable equipment, you will be able to make your own beehive equipment and start your own beekeeping colony at home.