How to Properly Use a Hive Smoker
The Hive Smoker: An Essential Tool for Beekeepers
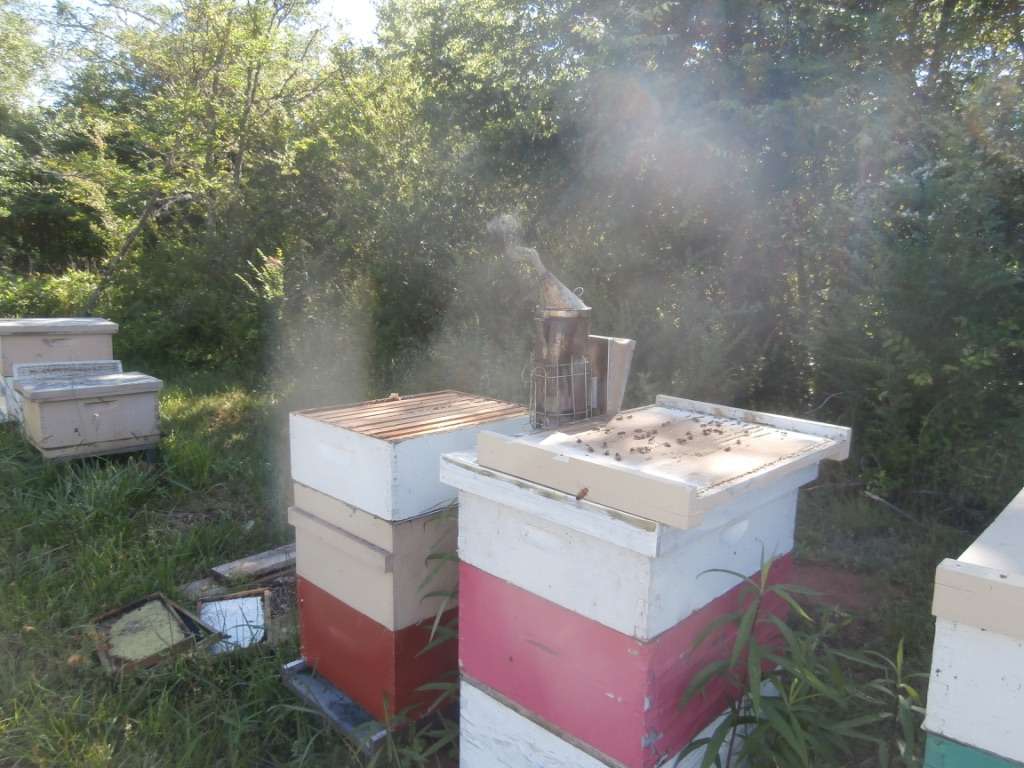
Hive smokers are a crucial tool for beekeepers, helping to calm bees during hive inspections and making the process safer and more efficient. The art of properly utilizing a hive smoker can make all the difference in a successful beekeeping experience.
Understanding the components of a hive smoker is the first step to mastering its use. The smoker body, bellows, fuel chamber, smoke chamber, and heat shield all play important roles in creating the right amount of smoke for the task at hand.
What is a Hive Smoker?
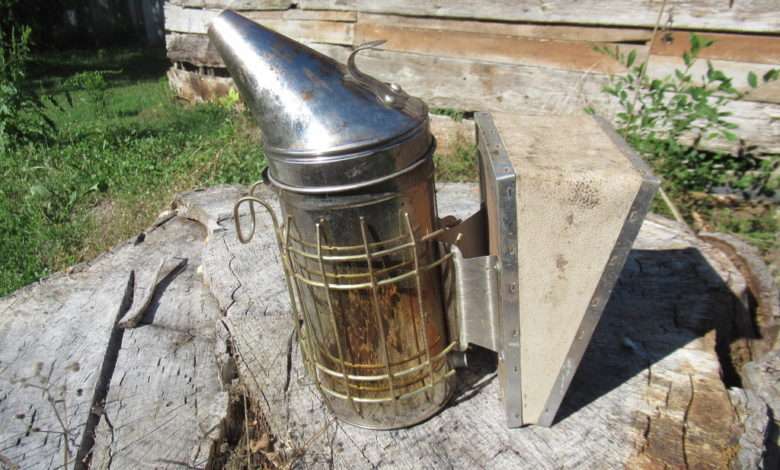
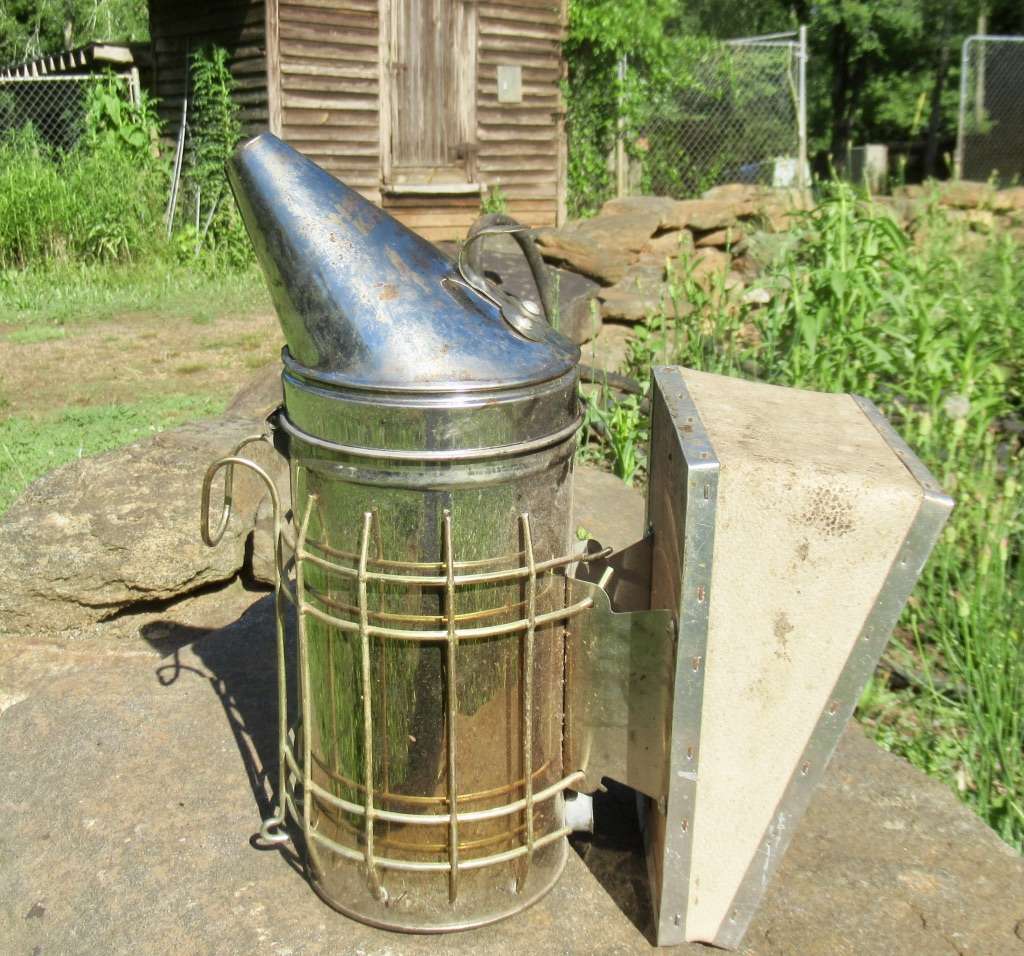
A hive smoker is a simple yet ingenious tool designed specifically for beekeeping. It consists of a small metal canister with a bellows attached to one end and a nozzle on the other. The canister is typically filled with various types of fuel, such as pine needles, wood shavings, or cotton.
When the fuel is ignited, the bellows pump air into the canister, producing a steady stream of cool smoke that is directed into the beehive through the nozzle.
Importance of Using a Hive Smoker
- Calming Effect: The primary purpose of using a hive smoker is to calm the bees during hive inspections or other manipulations. When smoke is gently released into the hive, the bees interpret it as an indication of a nearby fire. In response, they instinctively consume honey in preparation for a potential emergency swarm or relocation. This consumption of honey triggers a physiological response that makes the bees more docile, reducing the chances of aggressive behavior or stinging.
- Facilitates Manipulation: By utilizing a hive smoker, beekeepers can manipulate the hive more easily. When bees are calm and engrossed in consuming honey, they are less likely to become defensive and interfere with the beekeeper’s actions. This enables beekeepers to perform tasks like inspecting frames, checking brood health, or removing excess debris without causing undue stress to the bees or risking personal injury.
- Promotes Colony Health: The controlled use of a hive smoker also benefits the overall health of the colony. Smoke disrupts the bees’ communication system by interfering with the release and reception of alarm pheromones. This disruption prevents the rapid spread of defensive signals, allowing the beekeeper to work efficiently without triggering an aggressive response from the colony. Additionally, the bees’ consumption of honey during smoke exposure triggers a temporary hiatus in brood production, providing an opportunity for the beekeeper to manage the population growth and prevent overcrowding.
Brief History of Hive Smokers

The usage of smoke to control bees can be traced back to ancient times. Early beekeepers quickly recognized the remarkable effects of smoke on bee behavior. They discovered that by smoldering various substances near hives, bees would become less aggressive and more manageable during honey collection and hive management.
Hive smokers, as we know them today, have evolved significantly over time. Early beekeepers relied on materials readily available to them, such as burning straw or crushed leaves, to produce smoke. As beekeeping practices advanced, smokers became more purpose-built, with improved designs that facilitated smoke dispersion into the hive.
In the early 19th century, beekeeping pioneer Lorenzo Langstroth introduced a pivotal innovation to hive smokers – the introduction of a bellows mechanism, allowing beekeepers to control the amount and direction of the smoke. This improvement revolutionized the efficiency and effectiveness of hive smoking, cementing its place as an indispensable tool in modern beekeeping.
Types of Hive Smokers
Here are some different types of hive smokers used by beekeepers worldwide.
1. Traditional Hand Bellows Smokers:
- These classic smokers consist of a metal cylinder with a bellows attached at the bottom.
- Beekeepers manually pump the bellows to draw air through the smoker, igniting the fuel and producing smoke.
- Traditional smokers are typically made of stainless steel or galvanized steel.
- They are known for their durability and longevity.
- The size of the smoker determines the length of time it can produce smoke without refilling.
- Traditional smokers are lightweight, making them portable and easy to handle.
2. Electric Smokers:
- Pump or electric smokers are powered by batteries or electricity.
- These smokers eliminate the need for manual pumping or refilling of fuel.
- They often have a heating element or a pump mechanism that produces continuous smoke for an extended period.
- Electric smokers are typically used by professional beekeepers who need consistent and prolonged smoke output.
- These smokers can be relatively expensive compared to traditional or insertable smokers but offer convenience and efficiency.
Components of a Hive Smoker
Here, we will describe the various components that constitute a hive smoker and their importance in maintaining a harmonious beekeeping environment.
- The Smoker Body: The smoker body is the main structure of the hive smoker, typically made of durable and heat-resistant materials such as stainless steel or galvanized metal. It is designed to enclose the different components of the smoker, providing stability and insulation against external heat sources. The smoker body comes in various sizes, allowing beekeepers to choose one that suits their specific needs.
- The Bellows: The bellows, an integral part of the hive smoker, are responsible for providing a constant flow of air into the smoker to keep the fuel burning. Traditionally, beekeeping bellows were made of leather, but modern hive smokers often feature bellows made from synthetic materials like heavy-duty fabric or rubber. The beekeeper operates the bellows by pumping them, creating a steady stream of air that keeps the fuel smoldering and generates smoke.
- The Fuel Chamber: Situated within the smoker body, the fuel chamber is where the beekeepers place combustible materials that will generate the smoke. These materials can vary depending on availability and personal preferences but commonly include fuels like wood chips, dried herbs, pine needles, or cardboard. The fuel chamber should be filled adequately, allowing for a sustained smoldering process during hive inspections.
- The Smoke Chamber: Directly connected to the fuel chamber, the smoke chamber is where the smoke is generated and subsequently released. As the air pumped by the bellows passes through the fuel chamber, it absorbs the burning embers’ heat and carries small particles of material that produce smoke. The smoke chamber provides a controlled environment for this combustion, ensuring the production of cool, dense smoke.
- The Heat Shield: To prevent excessive heat transfer to the beekeeper’s hand or other objects, a heat shield is incorporated into the hive smoker design. Usually made of metal or other non-combustible materials, the heat shield acts as a barrier between the hot smoker body and the user’s hand. Its primary purpose is to protect the beekeeper from accidental burns without hindering the smoker’s functionality.
Exploring the Different Types of Fuel for a Hive Smoker
One of the key elements in a successful hive smoker is the choice of fuel. Here are some of the different types of fuel for a hive smoker, discussing the best options for both beginners and experienced beekeepers. Additionally, we will cover the proper lighting technique and maintaining a consistent burn.
Smoker Fuel Options
- Burlap: Burlap is a commonly used fuel option and readily available. It is affordable and easy to ignite. Beekeepers often prefer burlap because it produces dense and cool smoke, allowing for effective calming of the bees. However, it tends to burn quickly and needs frequent replacement.
- Pine Needles: Another popular choice for smoker fuel is pine needles. They are abundant in many regions and provide a long-lasting burn. The smoke produced by pine needles has a pleasant aroma and is gentle on the bees. However, it can be challenging to ignite and may require additional kindling.
- Wood Shavings or Pellets: Wood shavings or pellets, such as sawdust or wood chips, can also be used as smoker fuel. They offer a prolonged burn, allowing for extended use without frequent refills. However, it’s crucial to ensure that the wood used is untreated and free from chemicals, as these can harm the bees.
Best Fuel for Beginners
- Commercial Smoker Fuel: For beginner beekeepers, using commercially available smoker fuel is often recommended. These fuel options are specifically designed for hive smokers, providing a consistent burn and ease of use. They are typically made from a mix of natural materials and can be purchased at beekeeping supply stores or online.
- Pine Needles and Newspaper: Another excellent choice for beginners is a combination of pine needles and newspaper. The newspaper acts as an effective kindling, allowing for easy ignition of the pine needles. This combination offers an affordable and readily available fuel solution for those starting their beekeeping journey.
Best Fuel for Experienced Beekeepers
- Burlap and Wood Shavings: Experienced beekeepers often prefer a combination of burlap and wood shavings as their go-to fuel option. This combination provides a longer-lasting burn and produces a dense, cool smoke. The burlap ignites quickly, while the wood shavings ensure a sustained smoke production.
- Corncobs: Corncobs can be an excellent choice for experienced beekeepers, especially when dealing with particularly challenging colonies. They burn slowly and produce thick smoke, making them ideal for calming more aggressive bees. However, corncobs might take longer to ignite compared to other fuel options.
How to Properly Light the Fuel:
- Prepare the Smoker: Before lighting the fuel, ensure that the hive smoker is clean and free from any debris or leftover ash. This will allow for proper airflow and a more efficient burn.
- Add Fuel: Fill the smoker with your chosen fuel, ensuring it is loosely packed. Avoid stuffing the smoker too tightly, as it may restrict airflow and hamper combustion.
- Start the Fire: Ignite the fuel through the smoker’s entrance or the top opening. If using a newspaper or other kindling material, light it and introduce it into the smoker through the bottom.
Ensuring the Fuel Stays Lit:
- Puffing Technique: After lighting the fuel, use the puffing technique to keep it consistently lit. Squeezing the bellows of the smoker and delivering short puffs of air will supply oxygen, helping the fuel burn steadily.
- Monitor Airflow: Check the smoker regularly to ensure proper airflow. Clear any clogs, such as ash or unburned fuel, that may obstruct the airways. Maintaining an optimal airflow will help the fuel stay lit for an extended period.
Proper Techniques for Using a Hive Smoker
This section will guide you through the proper techniques for using a hive smoker, ensuring a smooth and successful inspection while promoting the safety of both beekeepers and bees.
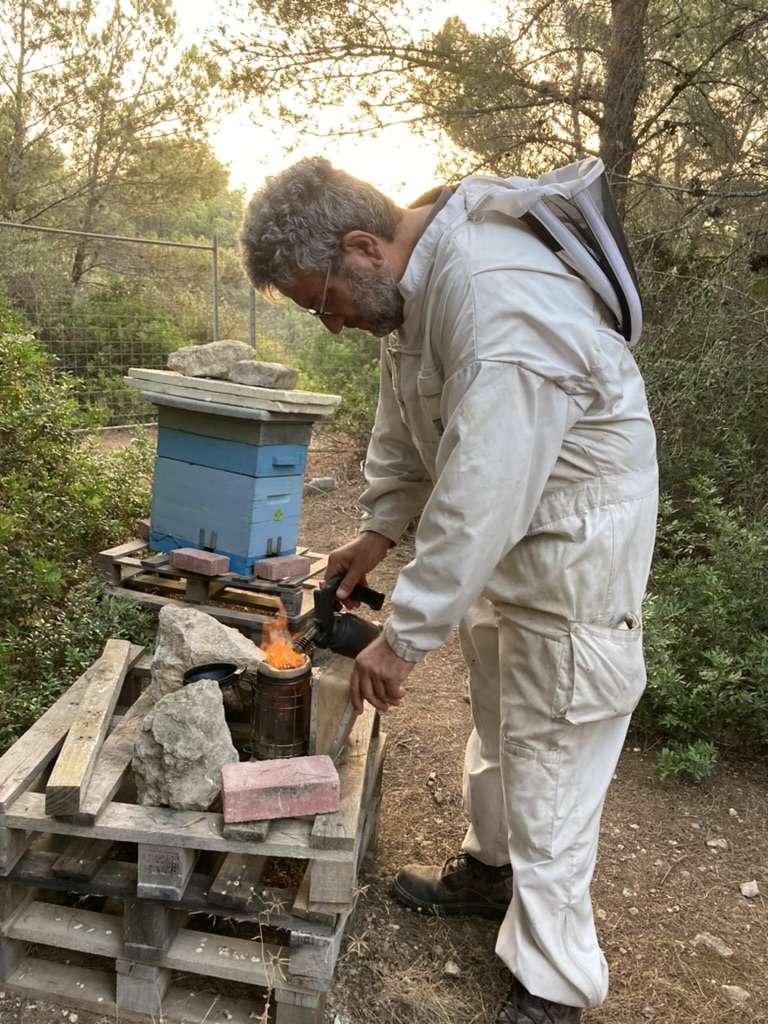
– Lighting the smoker:
Before beginning the hive inspection, it is crucial to properly light the smoker. Here’s a step-by-step guide to doing it right:
1. Gather necessary materials: Start by collecting dry, organic materials such as straw, wood chips, or dry leaves to use as fuel for the smoker.
2. Prepare the fuel chamber: Open the fuel chamber of the smoker and loosely pack it with the dry organic materials chosen. Avoid over-packing, as it can restrict the airflow.
3. Ignition: Light the fuel from the bottom, allowing it to catch fire gradually. Applying a flame directly to the top may extinguish the flame and delay the lighting process.
4. Let it smolder: Once the fuel is lit, allow it to smolder for a few minutes until it produces a steady stream of smoke.
– Puffing the smoker:
An essential technique for using a hive smoker is puffing the smoke onto the bees. This action helps to calm the bees and mask the pheromones released during disruption. Follow these steps for effective smoke puffing:
1. Firm but gentle puffs: Position the smoker near the hive entrance, blowing gentle but firm puffs of smoke into it. Avoid blowing the smoke vigorously, as this may cause harm to the bees.
2. Observe the bees’ reaction: Watch the bees closely to determine if they are reacting as desired. A proper smoke puff should result in bees moving away from the disturbed area, making it easier for you to conduct the inspection without fear of stings.
– Using the smoker throughout the hive inspection:
While conducting the hive inspection, it is essential to use the smoker strategically to maintain a calm environment for both you and the bees. Here are some guidelines to follow:
- Moderate and consistent smoke: As you progress through the hive inspection, periodically puff smoke to maintain a steady level of calmness among the bees. Avoid excessive smoke as it may cause unnecessary stress for the bees.
- Direct smoke away from comb: Always direct the smoke away from the comb and honey stores to prevent contamination.
– Re-fueling as needed:
During extensive hive inspections or when handling multiple hives, the smoker may require refueling to keep it burning consistently. Consider the following:
- Plan ahead: Before starting the inspection, keep extra fuel material nearby so you can quickly replenish the smoker if needed.
- Refuel cautiously: When refueling the smoker, open the chamber gently to avoid disrupting the lit fuel. Add the fuel slowly, allowing it to ignite gradually.
– Proper maintenance and cleaning of the smoker:
To prolong the lifespan and effectiveness of your hive smoker, it is important to practice proper maintenance and cleaning. Consider these best practices:
- Regular cleaning: After each use, allow the smoker to cool down and remove any remaining fuel and ashes. Use a brush or scraper to clean the interior and exterior surfaces.
- Replacement parts: Over time, certain parts of the smoker, such as screens or bellows, may become worn or damaged. Replace these parts to maintain optimal functionality.
Troubleshooting Common Issues with Hive Smokers
Like any equipment, hive smokers can encounter some common issues that may hinder their proper functionality. Here are some troubleshooting techniques for some of these issues, including a smoker that doesn’t stay lit, produces too much or too little smoke, faces challenging weather conditions, or becomes overheated. By addressing these problems, beekeepers can ensure their hive smokers are in optimal condition, allowing for smoother beekeeping operations.
– Smoker not staying lit:
- Check the fuel: Insufficient fuel may lead to an unstable flame. Ensure you have enough properly lit fuel, such as smoker fuel pellets, wood chips, or dry, partially decomposed plants.
- Fuel distribution: Make sure the fuel is evenly distributed within the smoker’s fuel chamber. Loose or unevenly packed fuel can result in the flame extinguishing frequently.
- Proper airflow: Ensure the smoker’s airflow vents are open and not obstructed. Sufficient oxygen supply is crucial for maintaining a steady flame.
– Smoker producing too much smoke:
- Adjust the fuel quantity: If your smoker is producing excessive smoke, try reducing the amount of fuel. Overloading the smoker can lead to dense, suffocating smoke that may agitate the bees rather than calming them.
- Monitor the smoldering rate: Keep an eye on the smoldering rate of your fuel. Faster smoldering can produce more smoke. Adjust the type of fuel or the packing method to control the smoldering rate and smoke output.
– Smoker not producing enough smoke:
- Check the fuel quality: Ensure you are using dry, well-seasoned fuel. Damp or wet fuel tends to smolder poorly and may produce less smoke.
- Size and packing of the fuel: Utilize smaller-sized fuel, such as wood chips or pellets, to enhance combustion and smoke production. Additionally, better packing of the fuel inside the smoker’s chamber can lead to improved smoke output.
– Addressing an overheating smoker:
- Regulate airflow: An overheating smoker can be dangerous, potentially causing burns or igniting nearby materials. To address this issue, partially close the smoker’s airflow vents to reduce oxygen supply and lower the temperature.
- Allow cool-down breaks: If the smoker feels excessively hot, set it aside for a few minutes in a safe area, allowing it to cool down before continuing to use it.
Conclusion
Utilizing a hive smoker properly is an essential skill for any beekeeper. With a thorough understanding of the components of a hive smoker, the different fuel options available, proper techniques for use, and troubleshooting common issues, beekeepers can ensure a successful hive inspection every time.
Practice and patience are key, and with time, beekeepers can perfect their hive smoker technique and enjoy a safe and productive beekeeping experience.
FAQ:
What is a hive smoker and why is it important for beekeeping?
- A hive smoker is a tool used by beekeepers to calm bees during hive inspections, making the process safer and more efficient.
How does a hive smoker work?
- The hive smoker works by combusting fuel, such as smoker pellets or burlap, to generate smoke. The smoke is then directed into the beehive through the smoker’s nozzle. The cool smoke interrupts the bees’ alarm pheromones and triggers their instinct to feed on honey, resulting in a calmer hive atmosphere.
When should I use a hive smoker?
- A hive smoker is primarily used during hive inspections, honey extraction, or any activity that requires close contact with the bees. It helps keep the honeybees calm, reducing the risk of stings and making the process smoother for both the beekeeper and the bees.
What are the different components of a hive smoker?
- The smoker body, bellows, fuel chamber, smoke chamber, and heat shield are all important components of a hive smoker.
What fuel should I use in my hive smoker?
- The ideal fuel for a hive smoker is dry, organic material that generates a cool smoke. Beekeepers commonly use smoker pellets, burlap, pine needles, dried leaves, or cardboard. Avoid using fuel that produces a hot flame or unpleasant odors, as it may distress the bees.
How do I start the hive smoker?
- To start your hive smoker, first ensure there are no obstructions in the smoker’s nozzle. Fill the smoker’s firebox with your chosen fuel and light it using a match or a smoker lighting device. Once lit, gently puff on the smoker to help the fire establish, ensuring good airflow.
How frequently should I puff on the hive smoker?
- Maintaining a consistent, gentle stream of smoke is key. Puff the smoker every 2-3 minutes, or as needed, to keep a continuous smoke flow. Overloading the hive with excessive smoke can harm the bees, so use it sparingly and efficiently.
How long does the smoke from a hive smoker last?
- The duration of the smoke depends on various factors, such as the type and amount of fuel used, weather conditions, and the smoker’s design. Generally, a properly fueled hive smoker can provide sufficient smoke for about 20-30 minutes before requiring refueling.
Can I reuse leftover fuel in my hive smoker?
- Yes, if there is some unburned fuel left in your hive smoker, you can reuse it for subsequent sessions. Simply close the smoker’s airflow to extinguish the fire and retain the fuel for future use. Remember to discard any ash or debris before refilling.
What are some common issues beekeepers may encounter with their hive smoker?
- Common issues include the smoker not staying lit, producing too much smoke, or not enough smoke. Windy or rainy conditions and an overheating smoker can also impact its effectiveness.
Why is it important to properly maintain and clean a hive smoker?
- Proper maintenance and cleaning will ensure the smoker continues to function properly and effectively during hive inspections.
Please note that these FAQs are intended as general guidance for using a hive smoker. Always refer to the specific instructions provided by the manufacturer of your hive smoker for the best results.